The Consistent Underwater Edit #5: Color Should Refine, Not Repair

Color is often the first thing underwater photographers notice when an image does not look quite right.
Maybe the water appears too blue or too green, the coral looks dull, or a fish has lost the vibrant colors you clearly saw during the dive. Perhaps a diver’s skin looks pale, magenta, or unnaturally orange.
In these moments, the typical instinct is to boost Saturation.
While increasing Saturation can sometimes give a quick burst of color and make the photo pop, it can also create electric blue water, oversaturated coral, unnatural skin tones, and colors that compete with your subject instead of supporting it.
Saturation is not a bad control.
The problem is using it to fix issues that should have been addressed earlier in the editing process.
In my approach, outlined in The Consistent Underwater Editing System, Color adjustments come after White Balance, Exposure, and Presence.
The sequence is crucial:
White Balance → Exposure → Presence → Color → Masking → Final Adjustments
First, White Balance establishes a believable color foundation and creates a more dependable relationship between the photograph’s warm, cool, green, and magenta tones.
Next, Exposure shapes the tonal structure by establishing brightness and contrast.
Then, Presence adds definition and clarity.
Only after these steps are working are you ready to carefully refine the photograph’s color.
The goal is not maximum Saturation.
The goal is believable, intentional color that supports the photograph.
When you follow this sequence, the colors in your underwater photographs can look natural, vibrant, and compelling while creating a believable interpretation of the scene and the conditions in which it was photographed.
Color Comes After Presence
In the previous lesson, The Consistent Underwater Edit #4: Presence Adds Definition After Exposure, we looked at how Texture, Clarity, and Dehaze can strengthen a photograph after White Balance and Exposure are working.
Presence helps reveal shape, texture, separation, and depth. That definition makes it easier to judge what the photograph’s color actually needs.
A coral formation that appears dull may not need more Saturation. It may need better tonal separation so its texture and structure are easier to see.
Blue water that appears weak may not need a stronger blue. It may need a more accurate Exposure or a small amount of Dehaze to restore depth and clarity.
A fish that looks lifeless may not be lacking color. It may need better White Balance, stronger tonal definition, or clearer separation from the background.
This is why Color comes after Presence.
You need to see the photograph clearly before deciding whether its color needs correction, enhancement, or no further adjustment at all.
Once White Balance, Exposure, and Presence are working together, color decisions become easier to diagnose and more precise to apply.
Instead of adding color simply because the photograph looks flat, you can determine what is actually causing the problem and choose the control that fits the job.
Check the Foundation Before Adjusting Color
Before opening the Color controls, pause and look at the photograph as a whole.
Ask:
Is the White Balance believable?
Is the photograph properly exposed?
Does the subject have enough definition?
Am I trying to solve a tonal or contrast problem with color?
Does the entire photograph have a color problem, or is the issue limited to one color or one area?
These questions help prevent you from using the wrong control for the wrong job.
In The Consistent Underwater Edit #2: White Balance Sets the Foundation, we established that White Balance must come before the other major adjustments.
White Balance determines the relationship between warm and cool tones and between green and magenta. If that relationship is incorrect, every later color decision is being made on an unstable foundation.
In The Consistent Underwater Edit #3: Exposure Comes After White Balance, we looked at why Exposure decisions become more dependable after the color foundation has been established.
Exposure also changes how color is perceived.
Dark colors may appear heavy or muddy. Bright colors may lose detail and look washed out. Shadows can hide subtle color, while bright highlights can make color appear weaker than it really is.
Before making any color adjustment, decide whether the photograph actually has a color problem or whether one of the earlier steps still needs attention.
Color should refine the work already completed through White Balance, Exposure, and Presence.
It should not be used to compensate for an incorrect foundation.
Correcting Color Is Different From Enhancing Color
One of the most important decisions at this stage is whether you are correcting or enhancing color.
They are not the same job.
Color Correction
Color correction addresses a visible problem.
You may be correcting:
a blue or green cast affecting the photograph
a cyan shift in the water
coral that appears too red or too magenta
skin tones that look unnatural
a fish color that no longer appears believable
an imbalance between ambient light and strobe light
Correction moves the photograph toward a believable color relationship.
Color Enhancement
Color enhancement strengthens color that is already working.
You may want to:
give muted reef colors slightly more presence
strengthen a naturally colorful subject
improve separation between the subject and background
refine the appearance of blue or green water
make an important color more noticeable without overpowering the photograph
Enhancement should begin only after correction is complete.
This distinction matters because photographers often begin enhancing before they have finished correcting.
The result may look more colorful, but it does not necessarily look more believable.
Diagnose the Scope of the Color Problem
Before choosing a Lightroom control, determine the scope of the problem.
Is it global, color-specific, or local?

A Global Color Problem
A global problem affects most or all of the photograph.
Examples include:
the entire image feels too muted
most colors appear too intense
the photograph lacks overall color energy
the color relationship across the image feels unbalanced
A global problem may call for a measured adjustment to Vibrance or Saturation, but only after White Balance has been confirmed.
A Color-Specific Problem
A color-specific problem affects a recognizable family of colors.
Examples include:
blue water appears too purple
cyan water is too bright
red coral is overpowering the scene
orange fish appear too saturated
green algae is drawing attention away from the subject
The Color Mixer may be more appropriate because it allows you to work with a broader color family without changing every color in the photograph.
Point Color may be better when the exact color you need to refine falls between those broader color ranges or requires more precise control.
A Local Color Problem
A local problem affects one subject or one part of the frame.
Examples include:
a diver’s skin tone needs correction, but the reef does not
one coral formation is too red
a strobe-lit fish needs adjustment without changing the water
one section of green water is affected by mixed light
a foreground subject and ambient background need different treatment
That is no longer simply a global Color adjustment.
It belongs in the next step of the workflow: Masking.
This distinction prevents you from changing the entire photograph to correct one limited area.
Four Color Controls With Four Different Jobs
Vibrance, Saturation, the Color Mixer, and Point Color can all affect color, but they do not perform the same job.
Choosing the right one begins with the problem you diagnosed.

Vibrance
Vibrance is a global color adjustment, but it does not affect every color equally.
It generally gives more attention to less saturated colors while placing greater restraint on stronger ones. This can make it useful when the photograph needs a measured increase in overall color without pushing every color too far.
That does not mean Vibrance is automatically the safest choice.
It still affects the photograph as a whole, and Lightroom does not understand that one area is water, another is coral, and another is a fish. It responds to the existing color and saturation within those areas.
As a result, Vibrance may improve muted reef colors while having less effect on already intense colors. It may also strengthen one part of the photograph more than another.
Use Vibrance when the image needs a broader, restrained increase in color energy.
Do not use it automatically on every underwater photograph.
The decision should still begin with the same question:
Does the photograph as a whole need more color, or is the problem limited to one color or one area?
Saturation
Saturation changes the overall intensity of color throughout the photograph.
Because it affects the image broadly, it can create a noticeable result very quickly. It can also push several colors too far at the same time.
Increasing Saturation may strengthen muted coral, but it can also make blue water look electric or unnatural. It may make a fish appear more colorful while pushing skin tones toward orange or magenta. It can also make color noise and other unwanted artifacts more visible.
Saturation is not a repair tool.
It should not be used to compensate for incorrect White Balance, weak Exposure decisions, or unfinished Presence adjustments.
Use Saturation only when the photograph as a whole needs a broader change in color intensity.
When you make that adjustment, evaluate the entire image, not only the color you hoped to improve.
Ask:
Does the water still look believable?
Do the strongest colors still contain detail?
Has one area become more distracting than the subject?
Does the photograph still feel balanced?
Saturation can be useful, but it requires restraint.
The goal is not to make every color stronger.
The goal is to make the overall color feel believable, intentional, and supportive of the photograph.
Color Mixer
The Color Mixer lets you work with broader color families.
In Lightroom and Lightroom Classic, you can refine Red, Orange, Yellow, Green, Aqua, Blue, Purple, and Magenta through Hue, Saturation, and Luminance.
Each control answers a different question:
Hue: Does this color need to shift toward a neighboring color?
Saturation: Is this color too weak or too intense?
Luminance: Is this color too dark or too bright?
The Color Mixer is useful when you can identify the broader color family causing the problem.
For example, blue water may not need more global Saturation. It may need a more thoughtful adjustment to Blue or Aqua.
Red coral may not require the entire photograph to become less colorful. The Red or Orange range may simply need refinement.
Remember that Color Mixer adjustments can affect similar colors throughout the photograph.
An Orange adjustment made for a fish may also affect coral or skin tones. A Blue adjustment made for the water may also affect blue markings on the subject.
Always inspect the complete image after making the adjustment.
Point Color
Point Color begins with a color sampled directly from the photograph.
It is useful when a specific color requires more precise attention than the broader Color Mixer ranges provide.
Underwater photographs often contain colors that do not fit neatly into a single category.
Water may fall between blue and cyan. Coral may contain a narrow red-orange tone. A fish may have a distinctive marking that does not respond cleanly to broader color adjustments.
Point Color can help isolate and refine that narrower color range.
Precision, however, does not remove the need for restraint.
A more precise tool can still create an unrealistic result if the selected range is pushed too far.
The question remains:
What problem am I solving?
Different Subjects Require Different Color Decisions
Underwater photographs often include several competing color environments within the same frame.
You may have ambient blue or green water in the background, a strobe-lit subject in the foreground, reflective fish scales, colorful coral, and a diver’s skin tone.
Those elements may not require the same adjustment.
Blue Water
Blue water should support depth, separation, and the atmosphere of the scene.
It does not have to be the deepest or most saturated blue possible.
Too much Saturation can turn believable water into an electric or purple background that competes with the subject.
Look at the relationship between the water and the subject. The water should help create the scene, not become the scene unless it is intentionally the main subject.
Green Water
Green water is not automatically incorrect.
Water color depends on location, depth, visibility, suspended material, light, and the conditions at the time of capture.
The goal is not to force all water to become tropical blue.
The goal is to make a deliberate decision about whether the water color is believable and whether it supports the photograph.
Correct an unwanted cast when necessary, but do not erase the character of the environment simply because another photograph has bluer water.
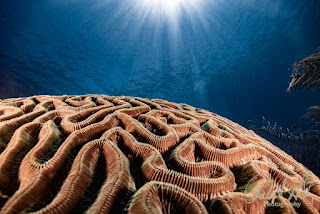
Coral
Coral can contain subtle combinations of red, orange, yellow, purple, green, and brown.
Increasing global Saturation may make coral more colorful, but it can also destroy those relationships and turn several distinct colors into one overpowering mass.
Look for separation and believability.
The coral should not appear more intensely colored than the lighting and conditions could reasonably support.
Fish
Many fish are naturally colorful, which makes them easy to oversaturate.
Bright markings can lose texture and detail when their color becomes too intense. Reflective scales can shift rapidly as Hue, Saturation, and Luminance are changed.
Pay attention to the entire fish, not only its brightest markings.
Color should reveal the subject’s natural character without making it look artificial.
Skin Tones
Skin tones require special attention because they can be affected by White Balance, strobes, ambient light, depth, and surrounding water color.
A global adjustment made to improve coral or a fish may make a diver’s skin too red, orange, or magenta.
When the diver needs a different color decision from the rest of the photograph, that is a strong indication that the correction belongs in Masking.
Artificial Light and Ambient Light
Strobe-lit foregrounds and ambient-light backgrounds often contain different color temperatures and different levels of color intensity.
Trying to solve that difference with one global slider can improve one part of the photograph while damaging another.
Sometimes the correct decision is to create the best overall balance at the Color stage and leave the remaining local difference for Masking.
You do not have to solve every problem with the control currently open.
Why Increasing Saturation Too Early Creates Problems
Increasing Saturation early can make a photograph feel improved because the change is immediate and obvious.
Obvious is not always accurate.
When the earlier steps are unfinished, additional Saturation can amplify the problems that are already present.
You may see:
water shifting toward electric blue or purple
green water becoming unnaturally intense
coral turning excessively red or orange
fish markings losing detail
diver skin becoming orange or magenta
color noise becoming more visible
foreground and background colors beginning to conflict
photographs from the same dive developing inconsistent color
The solution is not to avoid Saturation completely.
The solution is to earn the adjustment by completing the earlier decisions first.
Use Diagnose, Decide, Move On
The decision-making framework for The Consistent Underwater Editing System is:
Diagnose → Decide → Move On
Apply it directly to Color.
Diagnose
Ask what looks wrong.
Is the photograph suffering from an incorrect foundation?
Is the problem global?
Is it limited to a broader color family?
Is it a narrow, specific color?
Is the problem limited to one area of the photograph?
Decide
Choose the control that matches the diagnosed problem.
You may need:
Vibrance for a measured global refinement
Saturation for a deliberate overall intensity change
Color Mixer for a broader color family
Point Color for a narrower sampled color
Masking later for a localized correction
Do not choose the control first and then search for a reason to use it.
Move On
Make the smallest useful adjustment.
Evaluate the entire photograph.
Once the color looks believable and supports the subject, continue to the next step.
Do not keep adjusting simply because more controls are available.
Know When to Stop
Knowing when to stop is part of the editing process.
A photograph can move from muted to believable with only a few careful adjustments. It can also move from believable to oversaturated just as quickly.

Before leaving the Color stage, ask:
Does the water still look believable?
Does the subject remain more important than the color treatment?
Do coral, fish, skin tones, and water work together?
Have I preserved detail in strongly colored areas?
Does this photograph remain consistent with other images from the dive?
Am I correcting a problem, or am I simply increasing intensity?
Would another adjustment genuinely improve the photograph?
One useful technique is to look away from the image briefly and then return to it.
Your eyes adapt quickly to strong color. A short visual reset can make excessive Saturation easier to recognize.
It is also helpful to compare the current edit with the original photograph.
Do not ask only whether the edited version is more colorful.
Ask whether it is more believable, more intentional, and more effective.
The goal is not to demonstrate how much color Lightroom can create.
The goal is to use color in a way that supports the photograph.
Signature Color Style Comes Later
Many photographers want their images to have a recognizable color style.
That is a worthwhile goal, but style should be built on a dependable editing process.
Without that process, a signature look can become a set of repeated slider movements applied to every photograph, whether the image needs them or not.
One photograph may look successful, while the next becomes too warm, too cool, oversaturated, or inconsistent with the rest of the series.
A repeatable process gives your style a stronger foundation.
First, learn how to create believable color across different subjects, depths, lighting conditions, and water types.
Then you can begin making intentional choices about how you want your photographs to look.
Your style should develop from decisions you understand, not adjustments you repeat automatically.
After more than 50 years behind the camera and over 9,700 dives, I have learned that consistency does not come from forcing every photograph toward the same appearance.
It comes from making decisions in the correct order, understanding how each adjustment affects the next, and knowing when the photograph has reached the result you intended.
Process comes first.
Style grows from that process.
Color Should Refine, Not Repair
Color is one of the most powerful parts of an underwater edit.
It can restore balance, strengthen the subject, create separation, and help communicate the feeling of the scene.
It can also make a photograph look artificial when it is used without a clear diagnosis.
Before adjusting Color, confirm that White Balance, Exposure, and Presence are working together.
Then determine whether the remaining color problem is global, color-specific, or limited to one area of the photograph.
Choose the control that matches the problem.
Make the smallest useful adjustment.
Evaluate the entire photograph.
Then move on.
The goal is not maximum color.
The goal is believable, intentional color that supports the photograph.
Build a More Consistent Lightroom Workflow
When an underwater photograph looks blue, flat, oversaturated, or inconsistent, the problem is not always that you need another Lightroom tool.
Often, the problem is using the right control at the wrong point in the editing process.
My free guide, 10 Lightroom Fixes Every Underwater Photographer Should Know, will help you recognize common underwater editing problems and approach them with more structure and purpose.
It is designed to help you stop guessing, identify what the photograph actually needs, and make more confident editing decisions.
Put the Complete System Into Practice
Reading about a repeatable editing system is an important first step.
The next step is learning how to apply that system consistently to your own underwater photographs.
Underwater Lightroom Mastery is a six-week small-group cohort designed to help you turn the complete editing system into a dependable personal workflow:
White Balance → Exposure → Presence → Color → Masking → Final Adjustments
The cohort begins Wednesday, August 19, 2026.
During the six weeks, you will work with your own photographs, receive guidance and feedback, strengthen your decision-making, and practice the system until the sequence becomes more natural and repeatable.
Instead of wondering which Lightroom control to use next, you will learn how to:
Diagnose → Decide → Move On
The goal is better, more consistent underwater edits in less time, with the confidence of knowing what to adjust next.
Learn more and apply for Underwater Lightroom Mastery
Coming Next: Masking Fixes Local Problems
Color adjustments can improve the photograph globally or refine a particular color range.
But what happens when the water looks right, and the subject does not?
What happens when one fish, one coral formation, or one diver needs a different adjustment from the rest of the frame?
That is where Masking begins.
In the next lesson, we will look at why Masking comes after the global foundation is established and how it helps solve local problems without disrupting the rest of the photograph.
Until next time, dive safely, edit with purpose, and remember:
Diagnose → Decide → Move On
Bob Herb
Robert Herb Photography


Comments
Post a Comment
Please let me know your comments.