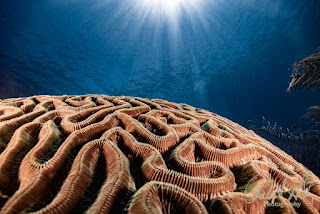
Optimizing Lightroom’s New AI Features for Underwater Shots
How to simplify underwater editing with Lightroom’s latest AI-powered tools.
During my weekly underwater show and photo presentations at Turquoise Bay Dive & Beach Resorts, I often receive questions about how my photos and videos appear to be captured in crystal-clear water despite the actual conditions we dove in that week. While I credit post-processing tools like Adobe Lightroom for this, the introduction of AI into these tools has made the editing process significantly easier.
Underwater photography presents unique challenges, including murky water, backscatter, and subdued colors, making it difficult to achieve stunning results. Adobe Lightroom has introduced new AI-powered tools to simplify the editing process for underwater images. This guide provides an overview of some of Lightroom's latest features, detailing where to find them and offering a step-by-step approach to effectively use these tools. Additionally, it includes specific examples to help you enhance your underwater photography.
1. AI-Powered Noise Reduction
Where to Find It:
- Open
your image in the Develop module.
- Navigate
to the Detail Panel on the right-hand side.
- Click
the Denoise (AI) button located above the Noise Reduction slider.
Step-by-Step Use:
- After
clicking Denoise (AI), Lightroom generates a preview.
- Use
the Amount slider to control the strength of the noise reduction.
- Click
Enhance to apply the changes. Lightroom creates a new, enhanced DNG
file.
Examples:
- Low-Light
Wreck Dive
Imagine you’ve shot a WWII wreck at ISO 6400 in dim light. The resulting noise obscures fine details. AI Denoise removes the grain while preserving the texture of rusted metal and marine growth. - Shark
Encounter at Depth
You capture a passing shark at ISO 3200, but shadow noise dulls the image. The tool smooths out noise while keeping the shark’s skin textures sharp. - Macro
Critters
Tiny nudibranchs shot at high ISO often suffer from amplified noise when cropped. AI Denoise ensures you maintain clarity in the details while reducing background noise.
Tips:
- Use Compare
View to see the difference between the original and enhanced file.
- Avoid
overusing the tool; too much noise reduction can make an image look
plastic.
2. AI-Powered Color Correction
Where to Find It:
- Go to
the Masking Panel in the Develop module (click the circle icon in
the top-right toolbar).
- Select Subject or Background to isolate parts of the
image for targeted adjustments.
Step-by-Step Use:
- Click Masking
and choose either Select Subject (to isolate a diver, fish, or
coral) or Select Background (to adjust water or surrounding
elements).
- Lightroom
auto-detects and creates a mask.
- Use
the sliders in the Mask Panel to adjust Temperature, Tint,
and Saturation for accurate color correction.
Examples:
- Correcting
Diver’s Skin Tones
Use Select Subject to isolate the diver, then adjust the Temperature slider to add warmth, bringing natural tones to skin washed out by the bluish-green underwater hues. - Enhancing
Coral Colors
Isolate coral with Select Subject to boost Saturation and fine-tune Hue sliders for vibrant, realistic colors without affecting the background water. - Adjusting
Jellyfish Transparency
A jellyfish often blends into the water. Use Select Subject to isolate it, then adjust Exposure and Vibrance for subtle but effective separation.
Tips:
- Combine
AI masking with the HSL Panel for precise control over specific
colors.
- For
images with tricky lighting, use the Auto Mask refinement tools to
adjust the AI selection.
3. AI-Driven Background Separation
Where to Find It:
- In the
Masking Panel, select Select Background to focus on the
non-subject areas.
- Alternatively,
use Brush Mask to fine-tune edges if needed.
Step-by-Step Use:
- Select
Background to let Lightroom automatically detect and mask the
background.
- Adjust
the Clarity, Texture, or Dehaze sliders to create
separation.
- For
dramatic effects, try darkening the background using the Exposure
slider.
Examples:
- Highlighting
a Sea Turtle
Use Select Subject to brighten the turtle and Select Background to slightly darken the water, drawing the viewer’s attention to the subject. - Simplifying
a Cluttered Reef Scene
Use Select Background to reduce Clarity and Saturation, making colorful fish stand out against a less distracting reef. - Creating
Depth with Blur
Simulate a shallow depth-of-field effect by reducing Texture and Clarity in the background while maintaining sharpness in your subject.
Tips:
- Always
review the mask edges to ensure no part of your subject is unintentionally
affected.
- For
backscatter-heavy images, reduce the background Dehaze to clean up
the water.
4. AI Adaptive Presets
Where to Find It:
- Open
the Presets Panel on the left-hand side of the Develop module.
- Look
under Adaptive Presets for AI-enhanced options tailored to specific
adjustments.
Step-by-Step Use:
- Select
an Adaptive Preset (e.g., Subject Pop or Deep Blue).
- Adjust
the strength using the Amount slider, if available.
- Fine-tune
individual adjustments in the Masking Panel after applying the
preset.
Examples:
- Enhancing
Blue Water
The Deep Blue preset enriches the color of open water, making it vibrant without oversaturating the subject. - Polishing
Macro Details
Subject Pop sharpens and brightens macro subjects while gently softening the background. It is perfect for tiny critters like shrimp or pygmy seahorses. - Sunlight
Enhancements
The Golden Glow preset enhances natural sunlight streaming through the water, ideal for dramatic silhouette shots.
Tips:
- Treat
presets as a starting point. Adjust sliders manually to fine-tune the
look.
- Combine
presets with other AI tools for maximum impact.
Common Underwater Problems and AI Solutions
|
Problem |
AI Tool |
Solution |
|
Backscatter |
Select Background |
Reduce texture and clarity for cleaner water. |
|
Faded Colors |
Select Subject |
Increase saturation and contrast on the subject. |
|
Murky Water |
Dehaze Slider (Masking) |
Clear up water while preserving subject detail. |
|
Overexposed Sunlight Areas |
Select Background |
Lower exposure and highlights in overexposed zones. |
Final Thoughts
Lightroom’s AI-powered tools are designed to solve the
unique challenges of underwater photography, streamlining complex edits and
delivering professional-quality results. Whether reducing noise,
correcting colors, or enhancing depth, these tools allow you to focus on
storytelling rather than struggling with technical fixes.
With these techniques, your underwater photos can go from
murky and muted to vibrant and awe-inspiring in just a few clicks. Dive in and
explore the possibilities!
Happy editing, Oceanic Explorers!
The above blog post showcases how AI tools can achieve each style, providing a comprehensive approach to building a unique and recognizable look in underwater photography. Do you have a signature style? I want to know what it is and how you use it in your photographs. Please post a comment below.
Stay Connected
Follow my blog for more tips and tutorials on underwater photography. Let's dive deeper into the art and craft of capturing the marine world!
Subscribe to my blog for more tips and tutorials on underwater photography. Remember to share your processed photos on social media using the hashtag #RobertHerbPhotography. I look forward to reviewing your results.
New Online Training Program
I am excited to announce that I am creating an online training program to teach underwater hobbyists and enthusiasts how to enhance their photos using Adobe Lightroom. If you are interested in this training or need more information, please go to (Underwater Photo Training) or contact me at bob@robertherb.com to express your interest and to be notified about the details and start date of the classes.
Stay tuned and "Follow" for upcoming blogs on underwater photography tips and tricks for more in-depth insights. Please leave your comments and suggestions. Enjoy your diving and shooting experience!
I am eagerly anticipating your valuable feedback and suggestions.
Sincerely,
Bob Herb
|
|


Comments
Post a Comment
Please let me know your comments.