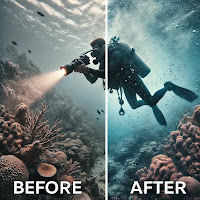
Noise Reduction vs. Sharpness: Finding the Balance in Murky Waters
If you've
ever taken underwater photos in murky conditions, you know the challenge: your
images are often riddled with noise, yet reducing it too much can rob them of
their sharpness. With its latest AI-powered tools, finding the right balance is an art that Adobe Lightroom helps us master. In this guide, I’ll walk you
through how to strike the perfect balance between noise reduction and sharpness
using five real-world underwater scenarios.
Why Does
Noise vs. Sharpness Matter?
High ISO settings are often necessary when shooting in challenging conditions, such as low-light environments or murky waters, particularly underwater photography. However, while these settings can help capture the scene, they frequently introduce noise, manifesting as unwanted graininess that can detract from the overall image quality. To address this issue, photographers often attempt to reduce noise, which can effectively smooth out the grain; however, an aggressive noise reduction process may inadvertently soften critical details in the image, resulting in a mushy or blurred appearance.
Conversely, sharpening is increased to recover lost details. In that case, it can exaggerate the existing noise, creating an unnatural and over-processed look that fails to represent the authentic atmosphere of the scene.
When used in tandem with the Detail panel, Lightroom's AI-powered Denoise feature offers a powerful solution for effectively managing these challenges. This combination allows photographers to selectively enhance their images, striking a delicate balance between noise reduction and preserving natural textures and details. Ultimately, this results in a more transparent, more vibrant underwater photograph that captures the essence of the environment without appearing artificial.
Example
1: Cleaning Up High-ISO Wide-Angle Shots in Poor Water Conditions
Scenario:
You're
diving in a temperate water zone, and your wide-angle reef shot at ISO 3200
comes out grainy due to low visibility and diffused sunlight. While you want to
clean up the noise, you must also preserve the intricate coral details.
Steps in
Lightroom:
- Apply AI Denoise:
- Open the Detail Panel in
the Develop Module (D).
- Click Denoise and set
the AI strength to 40-50% to reduce noise without over-blurring.
- Let Lightroom generate the
enhanced RAW DNG file.
- Refine Luminance Noise
Reduction:
- In the Detail Panel,
adjust Luminance (+30-40).
- Keep Detail around +50
to retain texture.
- Leave Contrast at +10 to
avoid losing tonal depth.
- Apply Selective Sharpening:
- Hold Alt (Option on Mac) while
dragging the Masking slider to sharpen only edges (+60-70).
- Set Amount (+50) and Radius
(+1.0) to avoid halos.
- Use AI-Powered Masking to
Enhance Edges:
- Click Masking (Shift + W)
> Select Subject to enhance foreground details.
- Increase Clarity (+10)
and Texture (+15) without introducing artificial sharpness.
💡 Pro Tip: Avoid overdoing Luminance
Noise Reduction—anything above +50 can make your wide-angle shot look like
an oil painting.
Example
2: Balancing Noise and Detail in a Macro Shot of a Seahorse
Scenario:
You've
captured a macro shot of a seahorse at ISO 1600 using a strobe or strobes,
but the background is noisy, and the subject lacks definition.
Steps in
Lightroom:
- Apply AI Denoise for Background
Smoothness:
- Click Denoise (Strength:
50%) to clean up grain without losing fine textures.
- Manually Reduce Noise in
Shadows:
- Use the Luminance Noise
Reduction slider (+40).
- Set Detail (+60) to
preserve the details on the seahorse’s body.
- Sharpen Only the Subject:
- Use the Masking Tool (Shift
+ W) > Select Subject.
- Increase Sharpening (+50),
Texture (+10), and Clarity (+15).
- Use a Radial Filter (Shift + M)
for Localized Detail Enhancement:
- Draw a filter around the
seahorse.
- Increase Contrast (+20)
and Clarity (+10).
- Reduce Noise Reduction
inside the radial filter to keep sharp edges.
💡 Pro Tip: For macro
photography, focus sharpening on key areas like the eyes and leave backgrounds
slightly softened for natural depth.
Example
3: Restoring Detail in a Night Dive Shot of a Hunting Octopus
Scenario:
During a
night dive, your octopus shot at ISO 6400 has excessive digital noise,
especially in darker areas. The challenge is to clean up the noise while
keeping the octopus’s skin texture.
Steps in
Lightroom:
- Run AI Denoise (50-60% Strength)
to Reduce Heavy Noise.
- Manually Adjust Noise Reduction:
- Luminance: +50
- Detail: +40 to preserve skin texture.
- Contrast: +15 to maintain dynamic range.
- Use Masking (Shift + W) to
Enhance the Octopus’s Eyes & Skin:
- Select Subject > Increase Clarity
(+20).
- Increase Sharpness (+30).
- Add Saturation (+10) to
make the eye pop.
💡 Pro Tip: Octopuses have
complex skin textures—use Texture over Sharpening to avoid
creating an artificial look.
Example
4: Maintaining Details in a Shark Motion Blur Shot
Scenario:
You’ve captured a shark in mid-motion, but the combination of ISO 5000 and a slow shutter speed introduced noise and slight blur.
Steps in
Lightroom:
- Apply AI Denoise (Strength: 40%).
- Reduce Noise in the Background
Using the Brush Tool (K).
- Reduce Noise (+40).
- Add a slight Clarity boost (+5) to separate the subject from the background.
- Sharpen the Shark Using a Linear
Gradient (Shift + L).
- Select the shark’s body and
apply Sharpening (+40).
- Reduce Luminance Noise (-10)
inside the mask to keep movement looking natural.
💡 Pro Tip: Avoid excessive
sharpening on motion-blurred subjects—it can make them look artificial.
Example
5: Bringing Out Details in a Silty Wreck Dive Scene
Scenario:
When shooting inside a wreck at ISO 3200, you make a lot of noise in shadowed areas, especially when trying to capture dimly lit structures.
Steps in
Lightroom:
- Apply AI Denoise (Strength: 45%)
for a Smooth Foundation.
- Increase Texture for Fine Metal
Details (+20).
- Sharpen Edges with a Mask:
- Select Edges manually (K).
- Increase Sharpness (+30).
- Increase Contrast (+15).
💡 Pro Tip: Over-sharpening dark
areas can bring out unwanted noise. Balance with moderate noise reduction.
Final
Thoughts: Mastering Noise vs. Sharpness in Lightroom
Achieving an ideal balance between noise reduction and image sharpness requires practice and a nuanced understanding of photographic editing. Adobe Lightroom’s AI Denoise feature is powerful, using manual sharpening techniques and selective masking. This combination effectively eliminates unwanted noise from images, particularly in shots that may appear murky or unclear, while simultaneously preserving and enhancing the finer details of the subject. By utilizing AI-driven technology and traditional editing methods, we can ensure our images remain vibrant and detailed, even in challenging conditions.
📌 Key Takeaways:
- Use AI Denoise for
high-ISO images but adjust Luminance Noise Reduction manually.
- Sharpen selectively—avoid global sharpening.
- Use Masking and Texture
enhancements to restore lost details.
- For macro shots, keep backgrounds smooth but
details crisp.
- For wide-angle wreck shots, balance sharpness with clarity
for depth.
Mastering
this balance will transform your murky water shots from grainy disappointments
to crystal-clear underwater masterpieces.
What’s your biggest struggle with noise and sharpness underwater? Drop a comment below, and let’s troubleshoot it together! 🚀💙
Ready to dive into more editing tips? Check out my other Lightroom guides at RobertHerb.blogspot.com.
Written by Robert Herb – empowering underwater photographers to capture and enhance the beauty of our oceans.
Stay Connected
Follow my blog for more tips and tutorials on underwater photography. Let's dive deeper into the art and craft of capturing the marine world!
Subscribe to my blog for more tips and tutorials on underwater photography. Remember to share your processed photos on social media using the hashtag #RobertHerbPhotography. I look forward to reviewing your results.
New Online Training Program
I am excited to announce that I am creating an online training program to teach underwater hobbyists and enthusiasts how to enhance their photos using Adobe Lightroom. If you are interested in this training or need more information, please go to (Underwater Photo Training) or contact me at bob@robertherb.com to express your interest and to be notified about the details and start date of the classes.
Stay tuned and "Follow" for upcoming blogs on underwater photography tips and tricks, which will provide more in-depth insights. Please leave your comments and suggestions. Enjoy your diving and shooting experience!
I am eagerly anticipating your valuable feedback and suggestions.
Sincerely,
Bob Herb
|
|


Comments
Post a Comment
Please let me know your comments.