Enhancing Sunrays and Light Beams in Lightroom.
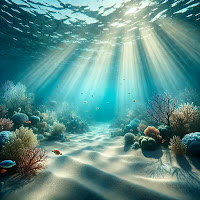
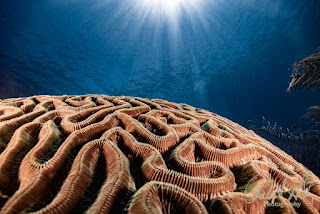
One of the most rewarding aspects of underwater photography is capturing the enchanting magic of natural light. Imagine light beams and sunrays gently streaming through the water, creating a captivating atmosphere that transforms your shallow water shots from good to absolutely stunning! These beautiful rays can elevate your images and give them that extra wow factor.
However, to ensure those rays shine, a little post-processing help can go a long way. Thankfully, Lightroom offers some incredible tools—including the latest AI enhancements—that make it easier than ever to emphasize these fantastic light effects.
I’m excited to share five fantastic techniques for enhancing sunrays and light beams using Lightroom in this guide. Each method is designed to be specific and comprehensive, perfect for bringing out the natural beauty in your underwater shots. So grab your camera, and let’s dive in!
1. Using the Radial Gradient Tool to Enhance Light Beams
The Radial Gradient tool is perfect for drawing attention to the light’s source while enhancing its spread.
Steps:
- Open your image in Lightroom and select the Radial Gradient tool (Shift + M).
- Draw a radial gradient starting from the light’s source (e.g., the sun visible through the water) and extending outward.
- Adjust the following sliders within the gradient:
- Exposure: Increase slightly to brighten the light beam.
- Highlights: Boost to make the rays more pronounced.
- Dehaze: Decrease slightly to add softness.
- Feather the radial gradient generously for a natural transition (50-70%).
- Use the Brush Tool (K) to erase the effect from unintended areas, such as darker zones or foreground objects.
Pro Tip:
Use the AI Masking Tool (Shift + Q) to automatically detect the brightest areas before applying your radial gradient. This will save you time and ensure accuracy.
2. Amplifying Rays with the Linear Gradient Tool
The linear gradient tool is handy when light beams are more directional, such as when sunrays cut diagonally.
Steps:
- Choose the Linear Gradient tool (M) and drag it across the area where the light rays are visible.
- Adjust the Exposure and Highlights sliders to brighten the beams.
- Use the Texture slider to add detail and definition to the light rays.
- Combine this with a touch of Dehaze to accentuate the light’s clarity.
- If needed, apply a second Linear Gradient in the opposite direction to balance the image.
Pro Tip:
If the rays are faint, duplicate the Linear Gradient mask by right-clicking on it and selecting “Duplicate” (Ctrl + D / Cmd + D) to amplify the effect.
3. Emphasizing Light Beams with AI Select Sky
Lightroom’s Select Sky feature, powered by AI, is perfect for isolating the water and water’s surface and emphasizing the sun’s rays through it.
Steps:
- Click on Masking (Shift + W) and choose Select Sky.
- Lightroom’s AI will isolate the water and the water’s surface.
- Use the Clarity slider to make the light beams pop.
- Decrease the Dehaze slider slightly to soften the surrounding water and create contrast.
- Adjust the Temperature slider to warm the beams for a golden glow.
Pro Tip:
Use Select Sky with the Brush Tool (K) to sharpen the mask edges and prevent the effect from extending into undesired areas.
4. Enhancing Rays with the Dehaze and Clarity Sliders
The Dehaze and Clarity sliders are incredibly effective for enhancing natural light beams without masking.
Steps:
- In the Develop module, navigate to the Basic panel (Ctrl + 1 / Cmd + 1).
- Adjust the Clarity slider to around +20 to +30 to emphasize the light rays’ edges.
- Increase the Dehaze slider for a crisper, more defined look.
- Balance the effect by slightly increasing Shadows to prevent the darker areas from becoming too prominent.
Pro Tip:
Use this technique with local adjustments like the Radial Gradient tool to fine-tune the rays’ intensity.
5. Painting in Beams with the Brush Tool
When the natural light rays are faint or nonexistent, you can create them manually using the Brush Tool.
Steps:
- Select the Brush Tool (K) and set a soft feather (50-70).
- Adjust the brush settings:
- Exposure: Increase slightly (+0.3 to +0.5).
- Highlights: Boost to add brilliance.
- Clarity: Add for definition.
- Paint along the natural direction of the rays, starting from the light source.
- Use the Flow slider to gradually build up the effect for better control.
- Refine the painted beams using the Eraser Tool (Alt + K / Option + K) to remove overspill.
Pro Tip:
Combine this method with a custom brush preset that includes slight warmth and added clarity for even better results.
Conclusion
Enhancing sunrays and light beams in Lightroom can transform your underwater photos, elevating them from good captures to breathtaking showstoppers. Whether you’re amplifying the rays already present in your shots or creatively crafting new ones from scratch, these techniques offer an excellent way to highlight the natural radiance of light.
The key to mastering these methods is to embrace experimentation, allowing you to adjust your approach to match each image's unique lighting conditions. Remember, Lightroom’s intuitive AI tools are designed to streamline this process, so feel free to lean on them for support in your creative journey. Dive into these techniques enthusiastically, and watch as your images shimmer with the brilliance of the sunrays they beautifully showcase!
Written by Robert Herb – empowering underwater photographers to capture and enhance the beauty of our oceans.
Stay Connected
Follow my blog for more tips and tutorials on underwater photography. Let's dive deeper into the art and craft of capturing the marine world!
Subscribe to my blog for more tips and tutorials on underwater photography. Remember to share your processed photos on social media using the hashtag #RobertHerbPhotography. I look forward to reviewing your results.
New Online Training Program
I am excited to announce that I am creating an online training program to teach underwater hobbyists and enthusiasts how to enhance their photos using Adobe Lightroom. If you are interested in this training or need more information, please go to (Underwater Photo Training) or contact me at bob@robertherb.com to express your interest and to be notified about the details and start date of the classes.
Stay tuned and "Follow" for upcoming blogs on underwater photography tips and tricks for more in-depth insights. Please leave your comments and suggestions. Enjoy your diving and shooting experience!
I am eagerly anticipating your valuable feedback and suggestions.
Sincerely,
Bob Herb
|
|


Comments
Post a Comment
Please let me know your comments.