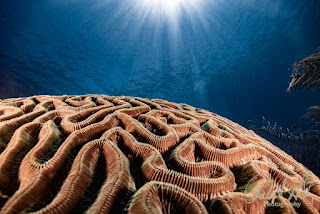
How to use Adobe Lightroom to adjust white balance in underwater photos.
Last week I did a blog about "Mastering White Balance" but continue to get great questions on how to do it. In this post, I will give more details on how to use Adobe Lightroom to make these adjustments. Keep in mind that white balance is a crucial aspect of post-processing in Adobe Lightroom, especially when working with underwater photography. It is one of the first steps I take in post-processing every photo using Adobe Lightroom. White balance helps you correct the color cast caused by the underwater environment, which is often tinted in blue or green due to the absorption and scattering of light. Here's why and how to adjust the white balance in Adobe Lightroom, along with the pros and cons of this method compared to in-camera adjustments:
Why Adjust White Balance in Adobe Lightroom for
Underwater Photography:
1. Correcting Color Cast: Underwater photos often
appear blue or green due to water's inherent color and the loss of certain
wavelengths of light as they travel through water. Adjusting white balance in
post-processing helps correct this color cast and bring back the true colors of
the subject.
2. Enhancing Image Quality: Proper white balance
adjustments can significantly improve the overall image quality and make your
underwater shots appear more vibrant and natural.
3. Flexibility: Post-processing allows you to
fine-tune the white balance to match your artistic vision and the specific
conditions in which the photo was taken.
How to Adjust White Balance in Adobe Lightroom:
- Import
Your Photos: Open Adobe Lightroom and import your underwater photos.
- Select
an Image: Choose the photo you want to work on and enter the Develop
module.
- White
Balance Tools: In the Develop module, you'll find various white
balance adjustment tools.
- Auto
White Balance: You can start by clicking the "Auto" button
to let Lightroom automatically adjust the white balance. This often
provides a good starting point.
- White
Balance Presets: Lightroom offers several presets (e.g., Daylight,
Cloudy, Shade) that you can apply to your photos to adjust the white
balance.
- White
Balance Dropper: Use the white balance dropper tool to select a
neutral area in the image, like a part of the subject that should be gray
or white. Lightroom will adjust the white balance based on that selection.
- Temperature
and Tint Sliders: Manually fine-tune the white balance by adjusting
the temperature (blue to yellow) and tint (green to magenta) sliders until
the colors look natural and pleasing.
- Before
and After: Always compare the adjusted image with the original to
ensure the colors look accurate and appealing.
Pros and Cons of Using Lightroom for White Balance
Adjustment vs. In-Camera Adjustments:
Pros:
- Flexibility:
Lightroom allows for precise and customized adjustments to match your
artistic vision and the specific conditions in which the photo was taken.
- Non-Destructive:
Lightroom's adjustments are non-destructive, meaning the original image
remains intact, and you can revisit and modify the white balance at any
time.
- RAW
Format: If you shoot in RAW, you have more data to work with in
post-processing, making white balance adjustments more effective.
Cons:
- Time-Consuming:
Adjusting white balance in post-processing can be time-consuming,
especially when dealing with a large number of photos. However, once you develop a consistent processing procedure, you can cut down the amount of time you spend on this.
- Learning
Curve: Adobe Lightroom requires some knowledge and experience to use
effectively, which might be a barrier for beginners. Once you learn how to properly use Lightroom and develop your own processing flow/procedure, the benefits of using Lightroom far outweigh the disadvantages.
- Not
Always Perfect: In-camera white balance settings are often designed
for specific underwater conditions and in many cases will give you inaccurate results.
Let me assist you in your underwater photographic journey with my upcoming online training course, which I will be announcing soon. If you are keen on acquiring more knowledge about it, kindly email me at bob@robertherb.com. You can also visit my website (Robert Herb Photography) to view some of my exemplary work.
I am eagerly anticipating your valuable feedback and suggestions.
Sincerely,
Bob Herb


Comments
Post a Comment
Please let me know your comments.