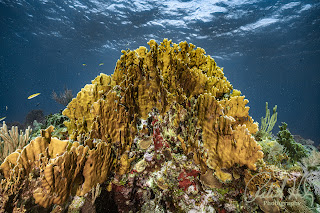
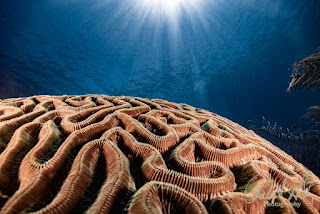
My preferred order of processing underwater photos using Adobe Lightroom.
Adobe
Lightroom is a powerful tool for processing underwater photos. It makes
adjusting the white balance, color, contrast, and other settings easy to create
stunning images. But what is the best order for processing underwater photos
using Adobe Lightroom? This article will provide a step-by-step guide on how to
process underwater images using Adobe Lightroom in the most efficient way
possible. We will discuss topics such as adjusting the white balance, color
correction, sharpening, noise reduction, cropping and resizing, and more. By
following these steps, you can ensure that your underwater photos are processed
in the most optimal way possible.
- Importing and organizing photos
- The first
step in processing underwater photos is to import them into Lightroom and
organize them into a logical file structure. This will make it easier to
find and work on specific images later. It's important to use clear and
concise file names and metadata to make it easier to search and sort
through your images.
- White balance adjustment - One of the most important
aspects of underwater photography is achieving accurate colors. The water
can affect the way colors appear, so it's important to adjust the white
balance first. This will ensure that the colors are as accurate as
possible before any other adjustments are made.
- Exposure adjustments - Once the white balance has been
adjusted, it's time to work on exposure. This can include adjusting the
exposure, contrast, highlights, shadows, and whites and blacks to achieve
the desired look. Pay attention to the histogram to ensure that the
exposure is balanced and that there are no blown-out highlights or crushed
shadows.
- Color correction - After adjusting the exposure,
it's time to fine-tune the color correction. This includes adjusting the
saturation, vibrance, and hue of specific colors to bring out the best in
the image. It's important to be subtle with these adjustments, as
oversaturation or over-correction can result in unrealistic-looking
images.
- Noise reduction - Underwater photography often
results in images with visible noise, particularly in low-light or
high-ISO situations. To reduce noise, use the noise reduction tools in
Lightroom. These tools can reduce the amount of color and luminance noise
in the image, resulting in a cleaner, clearer final image.
- Sharpening - The final step in processing
underwater photos is sharpening. This can help bring out the details in
the image and make it appear crisper and clearer. Use the sharpening tools
in Lightroom to adjust the amount, radius, and detail of the sharpening,
and be sure to preview the image at 100% to ensure that the sharpening
looks natural.
In
conclusion, the preferred order of processing underwater photos in Adobe
Lightroom is:
- Importing and organizing photos
- White balance adjustment
- Exposure adjustments
- Color correction
- Noise reduction
- Sharpening
Following
this order will help you achieve the best possible results in your underwater
photography. Happy editing and let me know what you think the best order is for
the development of Underwater Photos using Adobe Lightroom.
Bob Herb
| ||||||||||||||||||||


Comments
Post a Comment
Please let me know your comments.